

Building your own WordPress website can seem complicated when you’re starting out, but the process becomes much easier once you break it into manageable steps. In this guide, we’ll walk through how to build a WordPress website using Astra — from choosing your hosting and installing WordPress through to designing your pages, adding essential functionality and getting the site ready to launch.
Astra is a particularly useful theme for beginners because you don’t have to start with a blank screen. You can build the site yourself, use a Starter Template as a foundation, work with the WordPress block editor, or use a compatible page builder when you genuinely need one.
This isn’t about building the fanciest website possible. It’s about creating a site you understand, can maintain yourself and can expand as your needs grow. We’ll also point out some of the decisions that can save you considerable frustration later — including hosting, plugins, backups, performance and choosing the right editing system for the job.
By the end of this guide, you’ll have a practical roadmap from an empty WordPress installation to a working website you can actually manage.
Step 1: Planning Your Website
Identify Your Website’s Purpose
Before installing themes or choosing colours, decide what the website actually needs to do. A five-page business website has very different requirements from a blog, portfolio, affiliate site or online store.
Start by writing down the main purpose of the site and the actions you want visitors to take. That might be contacting your business, reading your articles, joining an email list, viewing your work or buying a product. Those decisions will influence your hosting, page structure, plugins and design choices later.
A useful rule: build for what you realistically need now, while leaving yourself enough room to grow. You don’t need every feature on day one.
Choose a Domain Name
Your domain name is the address people use to find your website. Aim for something easy to spell, easy to remember and closely connected to your business, brand or subject. Avoid unnecessary hyphens, confusing spellings and names that will severely limit you if the website grows in a slightly different direction later.
If possible, register the domain in your own name or business account rather than allowing a designer, developer or other third party to own it for you. Your domain is an important business asset, and you should retain control of it.
Select a Hosting Provider
Your hosting provider is where the files, database and other resources that make up your WordPress website are stored. For a beginner, the cheapest plan isn’t automatically the best choice — but neither do you need an expensive high-performance server for a simple new website.
Look at what you’re actually getting: suitable resources for your site, SSL, backups, support, server locations, email if you need it, and a straightforward way to install and manage WordPress. Also check the renewal price, not just the introductory offer. A very cheap first year can look quite different when the plan renews.
If you’re experimenting, learning or building a temporary project, free hosting can sometimes be enough. If you’re building a business website, affiliate site or something you expect to grow, paid hosting usually gives you considerably more control and room to develop.
If you’re unsure where you fit, read our Free vs Paid Website Hosting guide for 2026. It compares the costs, limitations, control, performance and growth considerations before you commit to either option.
If you’re ready to compare providers, our Hosting Reviews for 2026 bring together the hosting companies and options we’re currently assessing.
Before buying hosting: know what you’re building, check the normal renewal cost, confirm that WordPress is supported, and make sure you retain control of the hosting account and domain.
Step 2: Installing WordPress
Sign Up for Hosting and Install WordPress
Once your domain and hosting are ready, the next step is installing WordPress. Most mainstream WordPress hosts now provide an automated installer, so beginners rarely need to create databases or upload WordPress files manually.
The exact wording varies between hosting companies, but you’ll usually find an option such as Install WordPress, Create Website or Add New Site inside your hosting control panel. Follow the prompts, choose the domain you want to use and create your WordPress administrator account.
Choose Your WordPress Login Carefully
During installation you’ll normally create an administrator username, password and email address. Use a strong, unique password and avoid obvious administrator usernames where possible.
Keep the hosting login and WordPress login somewhere secure. They control different things: your hosting account controls the environment where the website lives, while the WordPress administrator account controls the website itself.
Before You Start Designing
- Confirm the website loads using HTTPS.
- Check that the correct domain is connected.
- Log into the WordPress dashboard successfully.
- Go to Settings → General and check the site title and administrator email.
- Go to Settings → Permalinks and make sure you’re happy with the URL structure before publishing lots of content.
- Remove any unwanted sample pages, posts or plugins your installation has added.
Don’t start installing dozens of plugins yet. Get the basic WordPress installation working first. We’ll add functionality later when we know what the site actually needs.
Step 3: Choosing and Installing the Astra Theme
Why Choose Astra?
Astra is a lightweight, flexible WordPress theme that works well for beginners but has enough room to grow with a more substantial website. You can start with the free version, customise the site yourself, or use one of Astra’s pre-built Starter Templates to give yourself a head start.
One reason we like this approach for beginners is that choosing Astra doesn’t force you into one particular way of building. You can work with the native WordPress block editor or choose a compatible page builder if the project genuinely needs one.
The free Astra theme is enough to build many straightforward websites. Astra Pro adds additional design and layout features, but you don’t need to buy Pro simply to follow this guide or get a basic site online.
Installation
To install the free Astra theme from your WordPress dashboard:
- Go to Appearance → Themes.
- Click Add New Theme.
- Search for Astra.
- Click Install.
- When installation finishes, click Activate.
Once Astra is active, you’ll also see Astra options within your WordPress dashboard. You don’t need to configure everything immediately. At this stage, we simply want the theme installed and working correctly.
Do You Need an Astra Starter Template?
No. You can build your Astra website manually from a blank installation.
However, Starter Templates can be extremely useful when you’re new to WordPress or want to get the basic structure of a website in place quickly. Rather than designing every page from scratch, you can import a pre-built website and then replace the demonstration text, images, colours and branding with your own.
The important thing to understand is that a Starter Template is a starting point, not your finished website. Don’t leave demonstration content, unnecessary pages or plugins in place simply because they arrived with the template.
How to Install Astra Starter Templates
Astra’s current Starter Templates system uses a separate plugin. To install it:
- Go to Plugins → Add New Plugin.
- Search for Starter Templates.
- Install and activate the plugin.
- Go to Appearance → Starter Templates.
- Choose the template/building route you want to use.
- Browse the available designs and select one that suits the type of site you’re building.
Astra’s current documentation confirms this workflow.
Block Editor or Elementor?
Astra’s Starter Templates are available for both the WordPress Block Editor and Elementor, depending on the template you choose.
Neither approach is automatically better. The important thing is to understand which editing system your pages use and avoid casually switching an established page or article between editors. Different builders store and style content differently, and changing editing systems after substantial work has been done can create unnecessary formatting problems.
For a straightforward content-focused website, the native WordPress Block Editor can keep the setup relatively simple. Elementor can be useful when you want more visual layout control. Choose according to the site you’re building rather than installing a page builder merely because a tutorial tells you to.
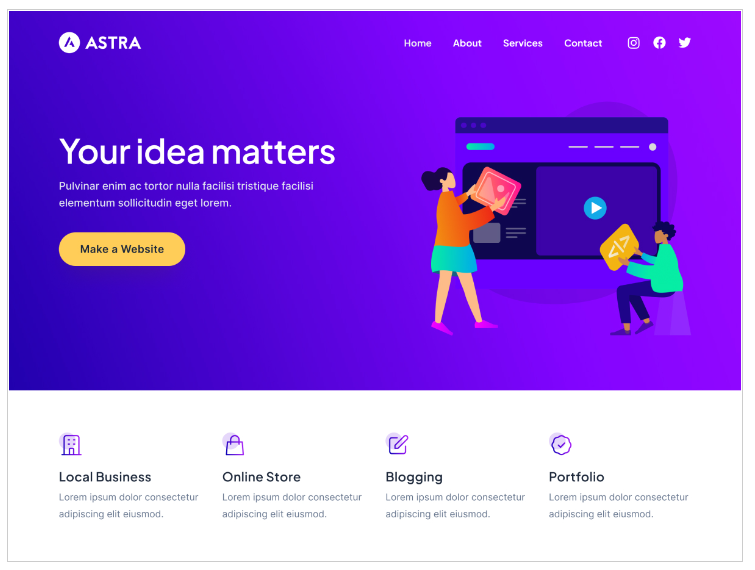
Step 4: Customizing Your Website
Start With Your Site Identity
Before worrying about individual pages, set up the basic identity of the website: your logo, site title, tagline and site icon (favicon).
With Astra, these settings are available through the Customizer and Header controls. Your logo and site identity appear throughout the website, so getting them right early gives you a consistent foundation for everything else.
Set Your Global Colours and Typography
One of the easiest mistakes when building your first website is styling every page individually. Instead, establish your main colours and typography at the theme level first.
In Astra’s Customizer you can set brand colours, heading fonts, body text and button styles so those choices can be used consistently throughout the site.
Keep the first version simple. Choose a small colour palette, readable body text and clear headings. You can refine the design later — consistency matters more than having twelve different fonts and seventeen shades of blue.
Build Your Header
Your header normally contains the elements visitors need on almost every page — typically your logo and primary navigation, and sometimes a button, search option or other important element.
Astra’s current Header Builder is available through Appearance → Customize → Header. It uses a visual drag-and-drop system for elements such as your logo, menus, buttons, search and social icons.
Keep the navigation understandable. A visitor shouldn’t need detective skills to work out where your About, Services, Blog or Contact pages are.
Build Your Footer
Don’t treat the footer as an afterthought. It is useful for secondary navigation, contact details, copyright information and links to important legal pages.
Astra’s Footer Builder is available through Appearance → Customize → Footer and allows you to arrange elements across the footer visually.
A simple footer might include your business or website name, copyright information, Privacy Policy, Terms and Conditions, Contact page and a small navigation menu.
Check Desktop, Tablet and Mobile as You Go
Don’t wait until the website is finished before looking at it on a phone. A layout that looks excellent on a large monitor can behave very differently on a narrow screen.
As you customise the site, regularly preview the header, navigation, text sizes, buttons and page spacing at different screen sizes. Fixing responsive problems as you build is considerably easier than discovering them across twenty finished pages later.
A useful principle: set the site-wide design first, then build individual pages. That reduces duplicated work and makes future changes much easier.
Step 5: Adding Pages and Content to Your Website
With the basic design in place, you can start building the pages people will actually visit. Don’t feel that you need twenty pages before you can launch. A smaller website with useful, complete pages is better than a large site filled with thin or unfinished content.
If keeping the initial cost under control is important, our guide to building and maintaining a website on a tight budget covers the practical decisions that can help you spend money where it actually matters.
Pages vs Posts: What’s the Difference?
Pages are generally used for the permanent parts of your website — such as Home, About, Contact and your main service or product pages.
Posts are better suited to articles, guides, news and other content you expect to publish over time. Posts can also be organised using categories and tags, making them particularly useful for a growing content website.
For example, the guide you’re reading now is a post. A site’s Contact page would normally be a page.
Which Pages Should You Build First?
The exact structure depends on the purpose of your website, but a straightforward business site might begin with:
- Home — explain what you do and help visitors find their next step.
- About — tell people who is behind the website and why they should trust you.
- Services or Products — explain clearly what you offer.
- Contact — make it easy for people to reach you.
- Privacy Policy — explain how the website handles personal information.
You may also need individual service pages, FAQs, a blog or articles section, Terms and Conditions, ecommerce pages or other content depending on what the website actually does.
Build Pages for Visitors, Not Just for the Menu
Before designing a page, ask what someone arriving there is trying to accomplish.
A homepage shouldn’t merely look attractive — it should quickly explain where the visitor is, what the website offers and what they should do next. A service page should answer the questions a potential customer is likely to have. A contact page should make contacting you straightforward.
This simple approach helps prevent a common beginner problem: spending hours designing a page without deciding what the page is actually supposed to achieve.
Using the WordPress Block Editor
WordPress’s native editor is commonly called the Block Editor or Gutenberg. Instead of treating the entire page as one document, content is created using individual blocks for paragraphs, headings, images, buttons, lists, columns and other elements.
To create a page, go to Pages → Add New Page. For an article, use Posts → Add New Post.
Add the content you need, preview the page and save your work regularly. You can rearrange blocks and change their individual settings without needing to write HTML.
Gutenberg or Elementor: Pick the Right Tool Before You Build
Astra can work with the native WordPress Block Editor as well as page builders such as Elementor.
For articles and straightforward content pages, we often prefer Gutenberg because it keeps the editing process relatively simple. A visual builder such as Elementor can be useful when a page requires more complex layouts or precise design control.
The important thing is to know which editor a page was built with before making major changes. Avoid casually opening an established Gutenberg page in a different builder simply to make a small edit. Different editing systems can handle content and styling differently, and switching between them unnecessarily can create formatting problems.
Whichever editor you choose, consistency makes the website much easier to maintain.
Create a Simple Content Structure Before You Get Fancy
For your first version, concentrate on clear headings, readable paragraphs, useful images and obvious calls to action. You can always improve the visual design later.
Use one main page title, then organise longer pages with descriptive subheadings. Break large walls of text into manageable sections and use lists or tables when they genuinely make information easier to understand.
Build the useful version first. Polish the clever version second.
Step 6: Add Plugins — But Only When You Need Them
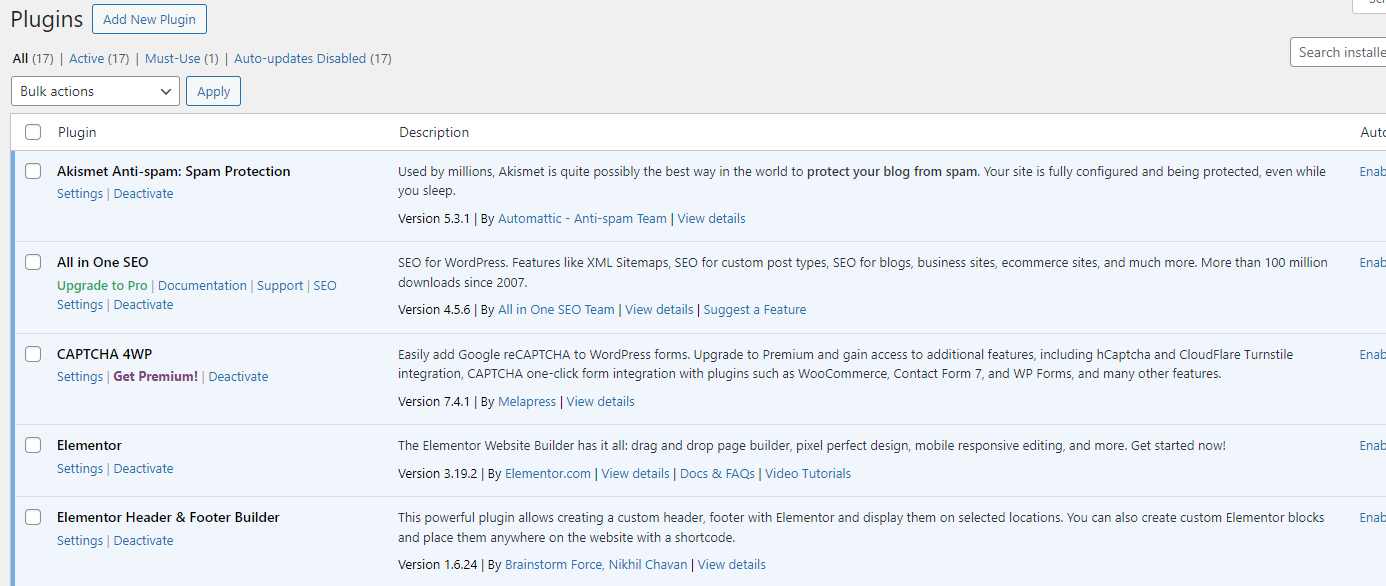
Plugins add functionality to WordPress. They can handle everything from forms and SEO to backups, security, ecommerce, caching and image optimisation.
That doesn’t mean a new WordPress website needs a huge collection of them.
Every plugin becomes another piece of software on your website that may need updates, configuration and occasional troubleshooting. Plugins can also overlap with features already provided by WordPress, Astra, your hosting company or another plugin.
Start With the Function, Not the Plugin
Before installing anything, ask:
What problem am I actually trying to solve?
Then check whether that function is already available through:
- WordPress itself
- Astra or your chosen theme
- your hosting account
- a plugin you already use
Only then look for another plugin.
This helps avoid ending up with several plugins doing similar jobs — something that can make a WordPress site harder to understand and maintain.
Plugins You May Eventually Need
The exact plugins you need depend entirely on the website. Common requirements include:
SEO — tools such as All in One SEO or another established SEO plugin can help manage search titles, descriptions, sitemaps and other search settings.
Forms — you may need a forms plugin if your site requires enquiries, registrations or more complex forms than your existing setup provides.
Backups — first check what your hosting company already backs up and how restores work. You may decide you also want an independent backup solution.
Security and spam protection — the appropriate setup depends on the site, host and features you’re running. Login protection, spam controls and sensible account security can all matter.
Performance and caching — many hosts now provide caching or performance tools themselves. Check what is already active before installing another caching or optimisation plugin.
Ecommerce — if you’re building a WordPress online store, WooCommerce is one of the major options, but don’t install it on a site that doesn’t need ecommerce functionality.
Page builders — Elementor and similar builders can provide extensive visual layout controls, but Astra and Gutenberg can already build many sites without an additional page builder.
How to Install a WordPress Plugin
When you do need one:
- Go to Plugins → Add New Plugin.
- Search for the plugin you want.
- Check that you’ve found the correct plugin and developer.
- Review whether it is actively maintained and compatible with your WordPress version.
- Click Install Now.
- Click Activate.
- Configure it rather than assuming activation alone has finished the job.
Don’t Keep Plugins Just Because They’re There
Periodically review the plugins installed on your website. If you no longer use one, establish whether it is safe to remove rather than leaving abandoned software sitting on the site indefinitely.
At the same time, don’t delete a plugin simply because you don’t recognise its name. First find out what it does. A plugin may be providing security, forms, redirects, backups, SEO, performance optimisation or another feature that isn’t immediately obvious from looking at the front end.
Our rule: fewer plugins isn’t automatically better. Fewer unnecessary plugins is better. Keep the tools your website genuinely uses, understand what they do, and avoid installing overlapping software without a reason.
Step 7: Launching Your Website
Do a Full Pre-Launch Check
Before telling anyone your website is ready, go through it as if you were a visitor seeing it for the first time.
Don’t just look at whether the design is attractive. Test whether the website actually works.
Before launch, check:
- Every page you intend visitors to see is published and complete.
- Navigation menus lead to the correct pages.
- Buttons and internal links work.
- There are no obvious spelling errors, placeholder text or demonstration content left behind.
- Your logo and site icon display correctly.
- Contact details are accurate.
- Images display properly and have useful alt text where appropriate.
- The site uses HTTPS without obvious security warnings.
- Your footer contains the links and information you intended to include.
Test the Website on Mobile
Open the actual website on a phone rather than relying entirely on the desktop preview.
Check the navigation menu, headings, images, tables, forms and buttons. Look for text running against the edge of the screen, oversized headings, strange spacing or elements that don’t stack properly.
A site isn’t finished because it looks good on the computer you built it on.
Test Your Forms Yourself
If the website contains a contact form, enquiry form, newsletter signup or other submission form, actually submit it yourself.
Confirm that the form accepts the submission, displays the expected confirmation and — most importantly — that the notification reaches the correct email address.
A beautiful contact form that sends enquiries nowhere is considerably worse than an ugly one that works.
Check Your Backups Before Launch
Know how your website is being backed up and how you would restore it if something went wrong.
Your hosting provider may already provide backups, but check what is included, how frequently backups are taken, how long they are retained and how a restore actually works.
For an important website, consider whether you also want a backup that isn’t dependent entirely on the same hosting account.
Check Whether Search Engines Can Index the Site
WordPress includes a setting that can discourage search engines from indexing a website while it is being developed.
Before launch, go to Settings → Reading and check the site’s search-engine visibility setting. If you want the public website to appear in search results, make sure you haven’t accidentally left a development-stage indexing restriction in place.
This setting is a request rather than an absolute access control, so don’t use it as a way of protecting genuinely private content.
Connect Your Search and Analytics Tools
Once the public site is ready, consider connecting the tools you’ll use to understand how it performs.
Google Search Console can help you see whether Google can discover and index your pages, identify some search and technical issues, and submit your sitemap.
An analytics platform can help you understand how people actually use the website. You don’t need to collect data simply because you can — choose the tools appropriate to the site and make sure your privacy information reflects the technologies you use.
Then Go Live
Once you’ve tested the website, confirmed the correct domain is connected and you’re satisfied that the important functions work, you’re ready to launch.
If you built the site using a temporary or staging address, follow your hosting provider’s process for moving it to the live domain and then test everything again.
Launching isn’t the end of building a website. It’s the point where real visitors start showing you what needs improving.

Step 8: Maintaining Your WordPress Website After Launch
A WordPress website isn’t something you build once and then forget. WordPress itself, your theme and your plugins will continue to receive updates, your content will change, and the needs of the website may grow over time.
You don’t need to spend every day tinkering with it. What matters is having a simple maintenance routine so small issues don’t quietly become large ones.
Keep WordPress, Astra and Your Plugins Updated
WordPress regularly releases core updates, while Astra and your installed plugins receive their own updates from their developers. These can include security fixes, compatibility improvements, bug fixes and new features.
Don’t ignore updates indefinitely, but don’t approach an important website recklessly either. Before major updates, make sure you have a usable recent backup and avoid updating everything simultaneously if doing so would make troubleshooting difficult.
After important updates, check the public website rather than assuming that an “Update successful” message means everything still looks and works exactly as expected.
Back Up the Website
Backups are your safety net when an update fails, a website is damaged, files are accidentally deleted or something else goes wrong.
Check what your hosting company already provides and understand:
- how often backups are created;
- how long they’re retained;
- what they include;
- whether you can restore them yourself;
- and what happens if the hosting account itself becomes unavailable.
The more important the website becomes, the more important it is to understand your recovery plan before you need it.
Keep an Eye on Security
WordPress security isn’t achieved by installing one magic security plugin. It comes from layers of sensible practices.
Start with strong unique passwords, keep WordPress/themes/plugins updated, remove software you no longer need, protect administrator accounts appropriately and use reputable hosting.
Depending on your setup, you may also use login protection, spam controls, a security plugin, firewall services or security features supplied by your host.
Don’t expose your website to unnecessary risk merely for convenience. For example, use administrator access only where it is genuinely required and be careful about giving third parties permanent access to hosting or WordPress accounts.
Review Your Backups and Security Occasionally
A backup system that worked two years ago isn’t useful if nobody has checked whether it still runs. The same applies to security settings, administrator accounts and old plugins.
Periodically check that backups are still being created, remove access that is no longer needed and review whether the tools installed on the site still serve a purpose.
Step 9: Performance, SEO and Growing Your Website
Keep an Eye on Website Performance
A website doesn’t need to achieve a perfect performance score to be useful, but visitors shouldn’t have to wait unnecessarily for pages to load.
Images are often one of the easiest places to start. Upload appropriately sized images, compress them where sensible and avoid using enormous image files when they’ll only appear relatively small on the page.
Caching and content delivery networks (CDNs) can also improve performance, but check what your hosting provider or existing optimisation tools already provide before installing additional plugins that duplicate the same job.
As your website grows, your hosting requirements may change too. A hosting plan that is perfectly adequate for a new five-page site may not remain the right fit if the site eventually receives substantial traffic or contains hundreds of pages and articles.
If you’re building for a business rather than a personal project, our website hosting guide for small businesses looks more closely at the hosting requirements and options worth considering.
Give Search Engines a Website Worth Understanding
SEO isn’t simply installing an SEO plugin and waiting for Google.
Start with useful pages that clearly answer the questions your intended visitors have. Give each important page a clear purpose, use descriptive headings, write sensible page titles and descriptions, and link related content together where doing so genuinely helps the reader.
An SEO plugin can help you manage technical elements such as search titles, meta descriptions and sitemaps, but the plugin doesn’t replace useful content or a well-structured website.
Use Google Search Console
Google Search Console is particularly useful once the website is live. It can help you see whether Google knows about your pages, whether important URLs are being indexed and which search queries are beginning to generate impressions and clicks.
Submit your XML sitemap and periodically review indexing and search-performance reports. If you substantially improve an important page that Google previously chose not to index, you can inspect that URL again and request indexing after confirming the updated page is accessible.
Don’t repeatedly submit the same unchanged URL. Improve the page when improvement is warranted, make sure Google can access it, then give the search engine time to reassess it.
Publish Content That Supports the Website
A business doesn’t need a blog simply because someone said every website needs one. But useful articles can be valuable when they answer genuine questions your customers or readers are already asking.
Rather than publishing large numbers of thin articles, build useful resources around the subjects your website genuinely covers. Over time, link related guides together so readers — and search engines — can understand how the topics connect.
Update older content when the information changes or when an existing article has the potential to become substantially more useful.
Use Analytics With a Purpose
Analytics can help you understand which pages people visit, where traffic comes from and how visitors move through the site.
Don’t collect numbers merely to have a dashboard. Decide what you actually want to learn — for example, whether visitors reach an important service page, whether articles generate search traffic or whether people complete an enquiry.
If you use analytics, advertising pixels, cookies or other tracking technologies, make sure your privacy information and consent setup are appropriate for the website and the jurisdictions relevant to it.
The goal isn’t constant tinkering. Build, measure, learn and improve where the evidence gives you a reason to do so.
Step 10: Contact, Legal Pages and Accessibility
Make It Easy for People to Contact You
If the website exists to generate enquiries, don’t make visitors hunt for a way to contact you.
Your Contact page should contain the methods you’re genuinely prepared to monitor — such as a contact form, email address, phone number or business location where appropriate.
If you use a contact form, test it yourself after launch and periodically afterwards. Confirm that submissions reach the correct inbox and that spam protection isn’t accidentally blocking legitimate enquiries.
Add the Legal and Privacy Information Your Site Needs
The legal pages required by a website depend on what the site does, where it operates and what information it collects.
Depending on your circumstances, you may need pages or notices covering areas such as:
- Privacy
- Terms and Conditions
- Cookies or tracking technologies
- Ecommerce terms
- Refunds and returns
- Affiliate relationships or other disclosures
Don’t copy another website’s legal pages and assume they’re suitable for yours. Your policies should reflect how your website actually operates and the laws that apply to it.
If the legal requirements matter to your business and you’re uncertain about them, obtain appropriate professional advice rather than relying on a generic template.
Think About Accessibility From the Beginning
Accessibility means making your website usable by as many people as reasonably possible, including visitors who use assistive technologies or have visual, hearing, motor or cognitive impairments.
Good basic practices include:
- using sufficient colour contrast;
- adding meaningful alt text to informative images;
- writing descriptive link and button text;
- structuring pages with logical headings;
- making text readable without unnecessarily tiny font sizes;
- ensuring important functions can be used without relying solely on a mouse;
- and avoiding design choices that make content unnecessarily difficult to read or navigate.
Accessibility is easier to build into a website gradually than to bolt onto a large site later.
Check Your Footer One Last Time
Before calling the build finished, look at your footer again. It is a natural place for important secondary links such as your Contact page, Privacy Policy, Terms and Conditions and other information visitors may need.
Make sure the copyright year, business/site name and links are current and that nothing from an imported Starter Template remains there accidentally.
At this point, you have the foundations of a real WordPress website — not simply an installed theme. The site has a purpose, structure, design system, content, appropriate functionality, a maintenance plan and a way for both visitors and search engines to understand it.
WordPress and Astra FAQ
Is Astra free to use with WordPress?
Yes. The core Astra WordPress theme is available free, and it is capable of building many straightforward websites without purchasing Astra Pro.
Astra Pro adds additional design and functionality options, but you don’t need it simply to install Astra, build pages or follow the basic process in this guide.
Is Astra good for beginners?
Astra can be a good choice for beginners because you can start relatively simply and add complexity only when you need it. It works with the native WordPress Block Editor and also supports popular page-building approaches.
Starter Templates can make the first build considerably easier because you don’t necessarily have to design every page from a blank screen. The important thing is to treat the template as a starting point and replace the demonstration content with your own.
Do I need Elementor to use Astra?
No. Astra does not require Elementor.
You can build an Astra website using the native WordPress Block Editor. Elementor can be useful when you want additional visual layout control, but adding a page builder also adds another system to learn and maintain.
Choose the editor that suits the website you’re building rather than installing Elementor automatically.
Can I use Gutenberg with Astra?
Yes. Astra works with the WordPress Block Editor, commonly called Gutenberg.
For articles and many straightforward pages, the Block Editor can provide everything you need while keeping the editing setup relatively simple.
Should I use an Astra Starter Template?
You don’t have to, but Starter Templates can save considerable time.
They’re particularly useful when you want a professional-looking structure to work from rather than designing every page yourself. Just remember to remove demonstration content, unused pages and unnecessary plugins after importing a template.
How many plugins does a WordPress website need?
There isn’t a correct number.
A simple website may need relatively few plugins, while a more complex site may legitimately need considerably more. The better question is whether each plugin performs a function the website actually needs and whether that function is already being provided elsewhere.
Fewer unnecessary plugins is more useful than chasing an arbitrary low plugin count.
Is Astra good for SEO?
A theme can help provide a technically sound foundation, but choosing Astra doesn’t automatically make a website rank in Google.
Search visibility also depends on factors such as the usefulness of your content, site structure, internal linking, accessibility to search engines, performance and competition for the searches you’re targeting.
An SEO plugin can help manage some technical elements, but neither the theme nor the plugin replaces useful content.
Can I change my Astra website later?
Yes. One of the advantages of building with WordPress is that your website can evolve as your needs change.
You can add pages, change navigation, adjust Astra’s styling, introduce new functionality and upgrade hosting as the site grows.
However, major changes are much easier when you understand how the existing site was built. Before changing themes, page builders or other fundamental parts of an established website, make a backup and understand what the change may affect.
What We’d Do If We Were Starting a WordPress Website Today
If we were starting a straightforward WordPress website with Astra today, we’d keep the first version deliberately simple.
We’d choose a domain we control, select hosting appropriate to the project, install WordPress and Astra, decide before building whether Gutenberg or a page builder was genuinely needed, and create only the pages required to make the website useful.
We’d install plugins when there was a clear reason for them — not because a checklist told us every WordPress site needed the same collection of software.
We’d make sure backups, security, mobile usability and contact forms worked before worrying about tiny design details. And once the website was live, we’d use real visitor behaviour and search data to decide what deserved improving next.
The first version of your website doesn’t need to be perfect. It needs to work, be understandable, and give you a solid foundation to improve.
Build that first. Then keep making it better.
Last updated: September 2026
Written by Martin Cohn
Martin builds and manages websites through Blue Ginger Studio, drawing on practical experience across a growing portfolio of business, content and affiliate websites.